1.1. The PennSim GUI
These tutorials will be using the PennSim LC3 simulator from the University of Pennsylvania.
- A guide on how to install and use PennSim can be found here: User Guide.
- We will be using basic commands found in this user manual: User Manual.
This guide does not cover the installation of the required dependencies or how to troubleshoot any issues with running PennSim. One common issue is not being able to assemble or load file, which can be caused by the PennSim JAR file being in an iCloud or OneDrive directory. After installation, when you run PennSim you will see a window that looks like the one in the image below.
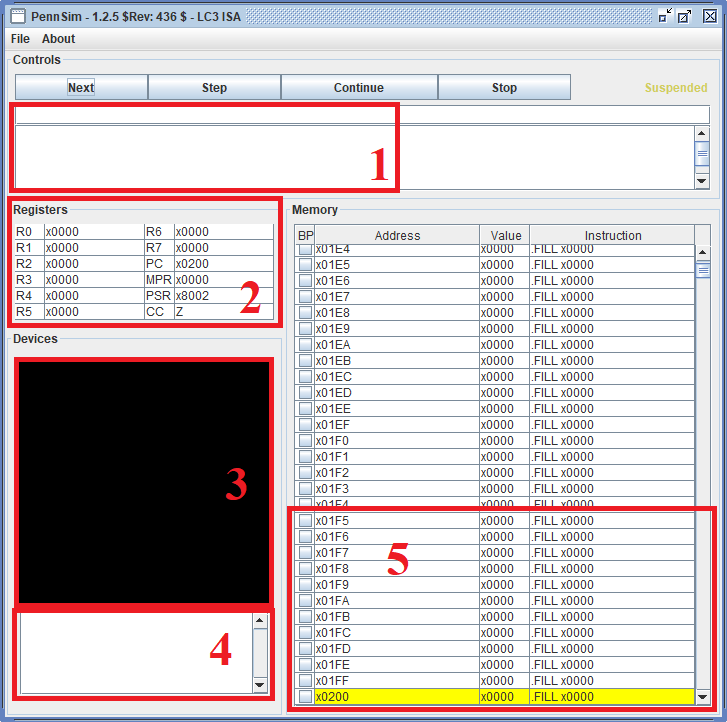
This window is where you will assemble, load and run your code.
- Command Line: Where you will type in “Control Commands”, commands that are used to operate PennSim. The command line output is how warnings and errors are conveyed to the user. We will go over a few commands more in depth in later sections. You can check out the user manual to see more about control commands.
- Registers: Shows the values of important registers.
- Graphics Display: We will dig deeper into the graphics display when we begin to use it. In short, we can change the color of each pixel in order to create images.
- Console: This is the text input/output interface. You must click this box in order to input text from the keyboard.
- System Memory: This area shows the value at each location in memory. You can set breakpoints in this window and use PennSim to step through your program. In the next section we will look at some basic control commands to get us started using PennSim.